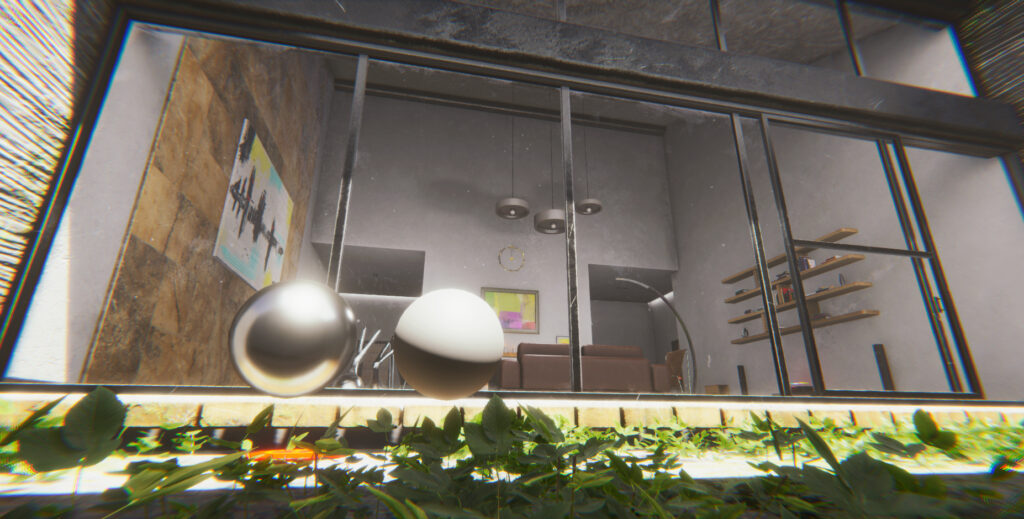
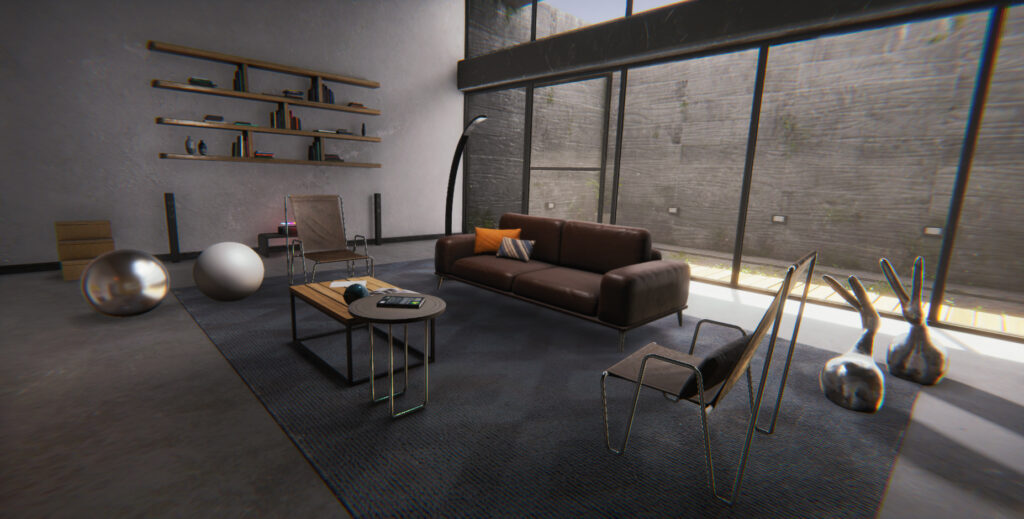
When creating materials, it is important to define their response to light, in this case being an architectural environment, the analysis of real objects is important. The previous assembly of a moodboard allows us to better organize the materials to be used for the subsequent adjustment of the specular, reflective, refraction and / or roughness level.


Awesome https://t.ly/tndaA
https://shorturl.fm/gTqNn
https://shorturl.fm/RTEqJ
https://shorturl.fm/Bh1lq
https://shorturl.fm/9nDet
https://shorturl.fm/XGFCf
Unlock top-tier commissions—become our affiliate partner now!
ursodiol medication
ursodiol medication
metoprolol tartrate
metoprolol tartrate
lasix furosemide 40 mg
lasix furosemide 40 mg
ivermectin for horses
ivermectin for horses
finasteride proscar
finasteride proscar
doxycycline hyclate 100 mg capsule
doxycycline hyclate 100 mg capsule
mirtazapine for anxiety
mirtazapine for anxiety
linezolid
linezolid
fluconazole tablet
fluconazole tablet
tetracycline hydrochloride cream
tetracycline hydrochloride cream
antibiotics online purchase
antibiotics online purchase
allopurinol gout
allopurinol gout
vibramycin medication
vibramycin medication
doxycycline hyclate for acne
doxycycline hyclate for acne
lamictal weight gain
lamictal weight gain
diflucan over the counter spain
diflucan over the counter spain
lasix furosemide 20 mg
lasix furosemide 20 mg
antibiotic doryx
antibiotic doryx
macrobid 100mg
macrobid 100mg
lasix injection
lasix injection
nexium tablets
nexium tablets
tadalafil commercial name
tadalafil commercial name
sildenafil fertility
sildenafil fertility
cialis generic online
cialis generic online
voriconazole dosing weight
voriconazole dosing weight
orlistat otc australia
orlistat otc australia
https://shorturl.fm/pyQvQ
cialis online us
cialis online us
viagra color perception
viagra color perception
cenforce 200mg black pill
cenforce 200mg black pill
https://shorturl.fm/7n9vp
cenforce review reddit
cenforce review reddit
https://shorturl.fm/nIc1V
does cenforce 100 work
does cenforce 100 work
what is cenforce 50
what is cenforce 50
cyclosporine vernal keratoconjunctivitis
cyclosporine vernal keratoconjunctivitis
levitra ingredients
levitra ingredients
famotidine max dosing
famotidine max dosing
Montenegro yacht rental https://rent-a-yacht-montenegro.com
Такие условия позволяют начать лечение без задержек и обеспечить более мягкое восстановление. При этом помощь может предоставляться анонимно.
Детальнее – нарколог на дом вывод из запоя санкт-петербург
Процедура вывода из запоя на дому включает несколько ключевых этапов, которые обеспечивают максимально быстрое и безопасное восстановление пациента. Эти этапы тщательно контролируются врачом, что минимизирует риски и помогает достичь наилучших результатов.
Получить дополнительную информацию – вывод из запоя на дому цена
Запой сопровождается выраженной интоксикацией, нарушением сна, слабостью и нестабильностью работы сердечно-сосудистой системы, что характерно для алкоголизма и других форм зависимости, включая наркомании. Самостоятельный выход из этого состояния может быть затруднён и сопровождаться усилением симптомов. Медицинская помощь на дому позволяет снизить риски и начать восстановление под контролем специалиста, помогая человеку быстрее стабилизировать состояние.
Получить дополнительные сведения – анонимный вывод из запоя на дому санкт-петербург
В Воронеже круглосуточная помощь при похмелье востребована в ситуациях, когда симптомы появляются внезапно или усиливаются в ночное время, особенно в запое или после запоя. Врач проводит консультацию, оценивает состояние пациента и принимает решение о проведении инфузионной терапии. Такой подход позволяет своевременно устранить симптомы и предотвратить их дальнейшее развитие. При необходимости можно оставить заявку, уточнить цены или получить помощь бесплатно на первичном этапе.
Выяснить больше – капельница от похмелья на дом
https://shorturl.fm/aex8i
Когда симптомы становятся настолько выраженными, что они мешают нормальному функционированию, капельница становится необходимостью. Она помогает избавиться от дискомфорта и значительно ускоряет процесс восстановления, давая организму все необходимые вещества для нормализации его работы, при этом может проводиться наркологическая детоксикация. Контроль врача на протяжении всей процедуры гарантирует, что капельница будет введена правильно и безопасно, с учетом всех показателей пациента, а при необходимости можно заказать дальнейшую реабилитацию и кодирование.
Исследовать вопрос подробнее – капельница от похмелья на дом в самаре
https://shorturl.fm/1HylP
услуги seo продвижения https://kormclub.ru
finasteride beard development
finasteride beard development
semaglutida precio colombia
semaglutida precio colombia
what is finpecia used for
what is finpecia used for
semaglutida efeitos colaterais quanto tempo dura
semaglutida efeitos colaterais quanto tempo dura
semaglutid tablett biverkningar
semaglutid tablett biverkningar
semaglutid wirkungseintritt
semaglutid wirkungseintritt
propecia finasteride reviews
propecia finasteride reviews
kamagra sydney cbd
kamagra sydney cbd
tadalafil effective time
tadalafil effective time
rogaine target usa
rogaine target usa
ozempic teeth study
ozempic teeth study
proscar finasteride msd
proscar finasteride msd
doxycycline chlamydia treatment for men
doxycycline chlamydia treatment for men
doxycycline 100mg for uti
doxycycline 100mg for uti
https://shorturl.fm/tdjOA
https://shorturl.fm/R0jK7
dog metronidazole side effects
dog metronidazole side effects
promo codes for true fortune casino promo codes for true fortune casino .
true fortune no deposit code http://www.true-fortune-casino4.com/ .
true fortune free 250 chip no deposit true fortune free 250 chip no deposit .
true fortune no deposit code http://www.true-fortune-unitedkingdom.com/ .
sildenafil dog dose
sildenafil dog dose
generic tadalafil pill
generic tadalafil pill
dove giocare crazy time https://crazytimeee.com/
solana online casino https://solanagxy.com/
foam minoxidil target
foam minoxidil target
acyclovir cream cost without insurance
acyclovir cream cost without insurance
bupropion for smoking cessation dosing
bupropion for smoking cessation dosing
orlistat 60mg price
orlistat 60mg price
liraglutide weight loss success stories
liraglutide weight loss success stories
crazy time in tempo reale https://www.crazy-timeitalia.com .
terbinafine dosage for fungal infections
terbinafine dosage for fungal infections
terbinafine nail fungus clinical info
terbinafine nail fungus clinical info
toradol migraine treatment summary
toradol migraine treatment summary
toradol pain guide
toradol pain guide
toradol nasal onset
toradol nasal onset
https://shorturl.fm/jOB1Q
ivermectin rosacea FAQ
ivermectin rosacea FAQ
ivermectin rosacea efficacy
ivermectin rosacea efficacy
ivermectin mechanism expert overview
ivermectin mechanism expert overview
minoxidil treatment reference
minoxidil treatment reference
Now thinking I want more sites built on this kind of editorial foundation, and a stop at tritonstyle extended that wish into a broader hope, sites built on substance and care rather than on metrics and growth are the kind of sites I want to see more of and this one is a small example worth supporting.
minoxidil troubleshooting faq
minoxidil troubleshooting faq
Now adjusting my expectations upward for the topic based on this post, and a stop at modernlivinghub continued that bar raising effect, content that resets what I think is possible on a subject is doing real work in shaping my standards and this site is providing those bar raising experiences at a notable rate during sessions.
minoxidil men’s expert guide
minoxidil men’s expert guide
Even on a quick first read the substance of the post comes through, and a look at hoppyharbor reinforced that immediate quality, content that does not require a slow careful read to demonstrate value but rewards one anyway is content with real depth and this site has produced work of that demanding depth class.
minoxidil women’s usage overview
minoxidil women’s usage overview
Vague feelings of recognition kept surfacing as I read because the writing names things I have been thinking, and a look at buildvelocitycleanly produced more of those recognition moments, content that gives shape to private intuitions is content that makes me feel less alone in my own thinking and this site has that effect.
Thank you for the genuine effort here, it shows in every paragraph and not just the headline, and after my visit to urbanfashion I was sure this site cares about getting things right rather than chasing clicks, which is the main reason I will come back later this week to read more.
Probably the kind of site that should be more widely read than it appears to be, and a look at ideaprogression reinforced that quiet wish, the gap between a sites quality and its apparent reach is sometimes large and that gap exists for this site in a way that makes me want to mention it more.
sildenafil leukemia contraindications
sildenafil leukemia contraindications
sildenafil mechanism in erection
sildenafil mechanism in erection
sildenafil authenticity validation
sildenafil authenticity validation
The app has a small size that does not take up much phone memory.
Installing the 888starz app on Android requires enabling the unknown sources option in settings.
The app runs efficiently even on mid-range devices without lag.
Updating the app periodically ensures a safer, more stable experience for the user.
The 888starz app is also available for iPhone on iOS with the same ease of use.
888starz apk 888starz apk
True Fortune gathers slots, table games and live dealers in one convenient place.
Fans of live gaming can join real-dealer tables running 24 hours a day.
The VIP scheme gives loyal users cashback boosts, gifts and a personal manager.
Verified players enjoy speedy payouts through their preferred method.
All games run on certified random number generators for provably fair results.
Clear rules and a well-organised help centre keep everything straightforward.
free spins promo codes for true fortune casino no deposit free spins promo codes for true fortune casino no deposit
Designed with players in the United Kingdom in mind, the site keeps registration and play simple.
Big-money jackpots and trending games are easy to find on the homepage.
The promotions page lists reload bonuses, tournaments and cashback offers.
Topping up an account is instant with no fees on most payment methods.
Certified RNG technology ensures every spin and hand is completely random.
The site is fully responsive, adapting to any screen size on the go.
true fortune casino free chip 2026 true fortune casino free chip 2026
https://shorturl.fm/EL6JV
vardenafil moderate dose
vardenafil moderate dose
صراحة أنا بقالي شوية أشهر بلعب على المنصة دي من الموبايل، وفكرت أقولكم اللي شفته علشان في ناس بتتخبط عن موضوع 888starz app. أكتر حاجة حبيتها إن المكتبة كبيرة جدًا، قريب من أكتر من 2500 لعبة سلوتس تقريبًا، ومش كلها حشو زي بعض المواقع التانية.
مطوري الألعاب ناس محترمين زي Pragmatic Play وNetEnt. أنا بلعب كتير على سويت بونانزا وجيتس أوف أوليمبوس، وبحب كمان Book of Dead. لو بتفضل اللعب الحقيقي فيه قسم اللايف من Evolution بكروبيهات حقيقيين، وشوز زي كريزي تايم بتكسر الملل.
موضوع العرض الترحيبي محترم صراحة: أول إيداع بياخد مية بالمية زيادة مع فري سبينز، وفيه عرض بدون إيداع لو بتحب تجرب الأول. بس انتبه لحتة من متطلبات الرهان اللي حوالي أربعين مرة — دي نقطة لازم تفهمها. لو عايز تتطلع على آخر العروض روح لـ تحميل 888starz وانت مطمن.
نقطة مهمة لينا كمصريين إن خيارات السحب والإيداع متنوعة: فيزا وماستركارد، وسكريل ونتلر، وكمان Bitcoin. الـwithdrawal بياخد يوم لتلاتة على المحفظة، مقارنة بحاجات تانية سحبت منها. التسجيل نفسه مش معقد، والحد الأدنى للإيداع بسيط.
النقطة الوحيدة اللي زعلتني إن خدمة العملاء مش دايمًا سريع الرد، ومرة استنيت شوية على الشات. غير كده تحميل التطبيق للأندرويد محتاج تسمح بمصادر خارجية، حاجة عادية بس مبتدئ ممكن يلخبط. الأبليكيشن سلس على الموبايل وبيجيله تحديثات باستمرار.
في العموم أنا كمّلت عليه أكتر مما توقعت، و888starz apk بقى أساسي على موبايلي. منظّم ومرخّص، وده بيريّح وانت بتحط فلوسك. لو حد جرّبه يشاركنا.
avanafil contraindication explanation
avanafil contraindication explanation
تحميل برنامج المراهنات 888 888starz تحديث
vardenafil 5 mg dose analysis
vardenafil 5 mg dose analysis
vardenafil food recommendations
vardenafil food recommendations
avanafil price breakdown
avanafil price breakdown
cGMP signaling mechanism
cGMP signaling mechanism
how fast vardenafil works
how fast vardenafil works
vardenafil side effect review
vardenafil side effect review
vardenafil precautionary warnings
vardenafil precautionary warnings
orlistat contraindicated groups
orlistat contraindicated groups